Connect AWS S3 Storage
Connect an AWS S3 bucket to your Deeplake organization. After setup, Deeplake tables read and write directly to your bucket. Deeplake mints short-lived STS tokens scoped to the bucket and, on the AssumeRole path, stores no long-lived customer-side secret.
Deeplake supports two authentication paths. Pick the one that matches your security posture.
| Path | Choose when | You provide | Deeplake uses |
|---|---|---|---|
| IAM User Keys | Fastest path. Works without any cross-account trust setup. Acceptable when policy allows downloading and storing AWS access keys. | A standard AWS access key (access_key_id + secret_access_key, with optional session_token for pre-issued STS triplets). | The keys directly, or as the principal for sts:GetSessionToken when scoping is needed. |
| AssumeRole | Production-grade. No customer-side IAM user, no shared access key. You create an IAM role in your account that trusts Deeplake's runtime role. Deeplake calls sts:AssumeRole to get short-lived credentials. |
A role ARN in your account, plus an external_id value (confused-deputy mitigation). |
sts:AssumeRole on your role. The resulting STS triplet is scoped to your bucket and expires in 1 hour. |
Both paths produce the same kind of STS triplet at the storage layer. The difference is whether Deeplake holds a long-term customer-side secret.
Setup time is about 3 minutes for either path. A future s3_federated (OIDC) path is planned and will mirror gcs_federated / azure_federated: a true OIDC web-identity trust between your role and Deeplake's per-credential OIDC issuer, with no stored secret on either side. Until that ships, AssumeRole is the no-stored-customer-secret path.
Prerequisites
| Requirement | Notes |
|---|---|
| An AWS account with an S3 bucket | Where Deeplake tables will store data. |
| A bucket already created | Each workspace writes objects under one bucket. Versioning and lifecycle rules are honored. |
| Permission to attach policies (IAM user path) or create roles (AssumeRole path) | For IAM User Keys: iam:CreateUser, iam:PutUserPolicy, iam:CreateAccessKey. For AssumeRole: iam:CreateRole, iam:PutRolePolicy. |
| Your AWS account ID | 12-digit number. From the AWS Console top-right, or aws sts get-caller-identity --query Account --output text. |
| AWS region of the bucket | For example us-east-1. Submitted in the wizard so Deeplake reaches the correct S3 endpoint. |
AWS CLI (version 2.13 or later) is recommended but optional. Each step also has an equivalent flow in the AWS Console.
If you are unsure which path to choose, start with AssumeRole. It is the only path that does not require Deeplake to store a long-term secret. Use IAM User Keys only when an internal policy prevents cross-account trust or when you need the wizard to complete in under a minute.
Overview
Open Workspace Settings -> Managed Credentials -> Add credential
                                   |
                                   v
                         Pick the storage type
                  +------------------------+--------------------+
                  |     AWS (IAM User)     |    AWS (Role)      |
                  +-----------+------------+----------+---------+
                              |                       |
              Paste access_key_id +              Submit role ARN +
              secret_access_key                  external_id +
              + bucket path                      bucket path
                              |                       |
                              v                       v
                Deeplake verifies access     Deeplake calls
                              |              sts:AssumeRole to mint
                              |              a probe triplet, then
                              |              writes to the bucket
                              +-----------+-----------+
                                          |
                                          v
                              State: verified
                                          |
                                          v
                          (Optional) Set as org default
1. Open the credentials wizard
In the Deeplake app, open your workspace and click Settings in the sidebar.
Scroll to Managed Credentials and click Add credential.
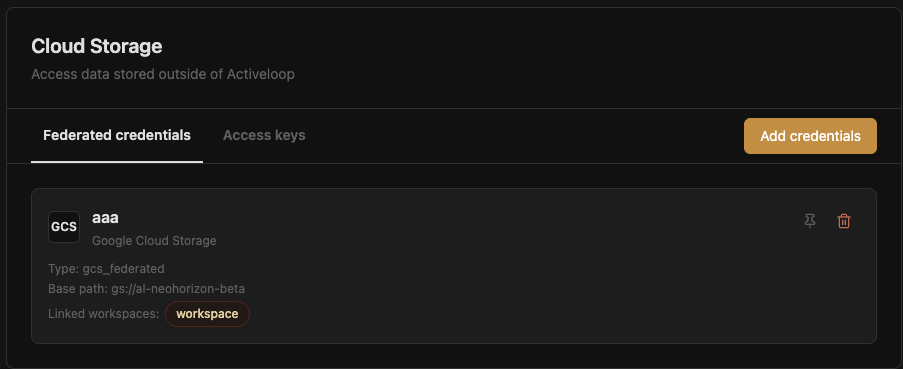
Pick your storage type:
- AWS (IAM User Keys): fastest. Requires an access key from an IAM user with bucket-scoped policy.
- AWS (AssumeRole): zero stored customer secret. Requires creating an IAM role in your account whose trust policy lists Deeplake's runtime role.
The two flows are documented separately below.
Path A: IAM User Keys
This path takes about 2 minutes. You provide an access key for an IAM user with s3:GetObject, s3:PutObject, s3:DeleteObject, and s3:ListBucket on your bucket. Deeplake stores the keys encrypted at rest and uses them directly to authenticate every storage operation.
A1. Create the IAM user and grant bucket access
USER_NAME="deeplake-storage"
BUCKET_NAME="my-deeplake-bucket"

# Create the user.
aws iam create-user --user-name "${USER_NAME}"

# Grant bucket-scoped permissions.
cat > deeplake-bucket-policy.json <<EOF
{
  "Version": "2012-10-17",
  "Statement": [{
    "Effect": "Allow",
    "Action": ["s3:GetObject", "s3:PutObject", "s3:DeleteObject", "s3:ListBucket"],
    "Resource": [
      "arn:aws:s3:::${BUCKET_NAME}",
      "arn:aws:s3:::${BUCKET_NAME}/*"
    ]
  }]
}
EOF
aws iam put-user-policy \
  --user-name "${USER_NAME}" \
  --policy-name deeplake-bucket-access \
  --policy-document file://deeplake-bucket-policy.json
AWS Console equivalent: IAM → Users → Create user → Attach policies directly → Create inline policy. Paste the JSON above. The user does not need any AWS console access; the keys-only programmatic access is sufficient.
Deeplake writes table data and reads it back. Read-only roles (s3:GetObject, s3:ListBucket only) are not sufficient. CREATE TABLE and INSERT will fail.
If you scope the policy with a prefix instead of ${BUCKET_NAME}/*, make sure the prefix matches the base_path you submit to Deeplake. arn:aws:s3:::my-bucket/lakedata/* works only if base_path is s3://my-bucket/lakedata.
A2. Generate an access key for the user
This prints AccessKeyId and SecretAccessKey once. Save them immediately. AWS does not show the secret again. If you lose it, generate a new key.
Treat the access key like a password. Anyone with both halves can read and write the bucket.
A3. Fill in the wizard
| Field | Example | Notes |
|---|---|---|
| Name | prod-s3-storage |
Internal label. Letters, digits, hyphens, underscores. |
| Base path | s3://my-deeplake-bucket/lakedata |
Pattern: s3://, your bucket, optional /prefix. The bucket must exist; the prefix does not have to. |
| Region | us-east-1 |
The bucket's region. Submitted so Deeplake reaches the correct S3 endpoint. |
| Access key ID | AKIA... |
From the output of A2. |
| Secret access key | wJalrXUtnFE... |
From the output of A2. Encrypted at rest with envelope encryption (per-org KMS key wrapping a per-credential data key). |
| Session token (optional) | IQoJb3JpZ2lu... |
Only for pre-issued STS triplets. Leave blank for permanent access keys. |
Click Create. The wizard runs three checks:
- Validates the key format (AccessKeyId starts with
AKIAorASIA; secret is 40 characters). - Mints a test S3 client and performs a probe write to
<base_path>/.deeplake_probe. - Marks the credential
verified.
S3 naming rules are enforced on submit:
- Bucket: 3 to 63 characters, lowercase letters, digits, hyphens, periods. Must start and end with a letter or digit. No consecutive periods. No IP-address shaped names.
- The prefix portion of
base_pathaccepts any valid S3 key path.
If any check fails, the wizard displays a precise error. See Troubleshooting.
Path B: AssumeRole
This path takes about 3 minutes. You create an IAM role in your account whose trust policy lists Deeplake's runtime role ARN and an external_id value. Deeplake calls sts:AssumeRole on every storage operation to mint a short-lived triplet. No long-term customer-side secret is stored on the Deeplake side.
B1. Fill in the credential form
In the Add Credentials dialog, pick AWS (AssumeRole) and fill in the bucket URI, a name, and the region.
| Field | Example | Notes |
|---|---|---|
| Name | prod-s3-role |
Internal label. Letters, digits, hyphens, underscores. |
| Bucket URI | s3://my-deeplake-bucket |
The bucket Deeplake will read and write to. Path scoping happens at the role's inline policy in B2. |
| Region | us-east-1 |
The bucket's region. |
Click Next. Behind the scenes, Deeplake:
- Allocates a credential ID.
- Generates a per-credential
external_id(a UUID). - Returns its runtime-role ARN and the generated
external_id.
The next screen shows the trust policy pre-filled with Deeplake's <DEEPLAKE_ACCOUNT_ID>, <DEEPLAKE_RUNTIME_ROLE>, and your <EXTERNAL_ID>. Copy it.
B2. Create the role with the pre-filled trust policy
The wizard shows the exact trust policy and the role-creation command. Click Copy command and run it in any shell that has aws authenticated as a principal with iam:CreateRole:
ROLE_NAME="deeplake-customer-access"
BUCKET_NAME="my-deeplake-bucket"

# 1. Save the wizard-provided trust policy.
cat > trust-policy.json <<'EOF'
{
  "Version": "2012-10-17",
  "Statement": [{
    "Effect": "Allow",
    "Principal": { "AWS": "arn:aws:iam::<DEEPLAKE_ACCOUNT_ID>:role/<DEEPLAKE_RUNTIME_ROLE>" },
    "Action": "sts:AssumeRole",
    "Condition": { "StringEquals": { "sts:ExternalId": "<EXTERNAL_ID>" } }
  }]
}
EOF

# 2. Create the role.
aws iam create-role \
  --role-name "${ROLE_NAME}" \
  --assume-role-policy-document file://trust-policy.json

# 3. Attach a bucket-scoped policy.
cat > bucket-policy.json <<EOF
{
  "Version": "2012-10-17",
  "Statement": [{
    "Effect": "Allow",
    "Action": ["s3:GetObject", "s3:PutObject", "s3:DeleteObject", "s3:ListBucket"],
    "Resource": [
      "arn:aws:s3:::${BUCKET_NAME}",
      "arn:aws:s3:::${BUCKET_NAME}/*"
    ]
  }]
}
EOF
aws iam put-role-policy \
  --role-name "${ROLE_NAME}" \
  --policy-name deeplake-bucket-access \
  --policy-document file://bucket-policy.json
AWS Console equivalent: IAM → Roles → Create role → Custom trust policy. Paste the trust policy from the wizard. On the Add permissions step, click Create policy and paste the bucket policy. Name the role and save.
What this grant allows: Deeplake's runtime role can call sts:AssumeRole on ${ROLE_NAME}, but only with the matching external_id. The resulting STS triplet can read and write under ${BUCKET_NAME}, and nothing else. The trust is auditable in your account (it appears in IAM → Roles → ${ROLE_NAME} → Trust relationships) and revocable by deleting the role or changing its trust policy.
B3. Submit the role ARN
Copy the role ARN from the AWS Console (or from aws iam get-role --role-name "${ROLE_NAME}" --query 'Role.Arn' --output text) and paste it into the wizard.
| Field | Example | Notes |
|---|---|---|
| Role ARN | arn:aws:iam::123456789012:role/deeplake-customer-access |
The full ARN, with the account ID and role name. |
Click Verify access. Deeplake calls sts:AssumeRole with the pre-generated external_id, then performs a probe write to <bucket>/.deeplake_probe. Possible outcomes:
- Credential connected. State is now
verified. The credential is ready to use. - Waiting for IAM propagation. New trust policies and inline role policies take 10 to 60 seconds to propagate.
- AccessDenied on AssumeRole. The trust policy does not list Deeplake's runtime role correctly, or the
external_idcondition does not match. Re-copy the trust policy from the wizard. - AccessDenied on S3. The role's inline policy is missing or does not cover the bucket. Re-attach the bucket policy from B2.
- Bucket not found. The bucket name in
base_pathis wrong, or it does not exist in the region you submitted. - Timed out. The wizard offers Retry or Save anyway. Save anyway leaves the credential unverified but usable. Verification is retried on the first
/credscall.
For support tickets, the GET /credentials/{id} response exposes last_error_provider_error with the raw AWS error code (AccessDenied, NoSuchBucket, InvalidClientTokenId, and others). Include it. It disambiguates cases that share the same user-facing message.
Use the credential
Once the credential is verified, there are three ways to use it.
Set as org default (optional)
Toggle Set as org default on the success screen, or set it later from the credential list. Every workspace in the organization without its own credential link will use this one.
The resolution order is workspace credential, then org default, then environment default. Workspace-level links take precedence.
How credentials link to new workspaces
The workspace-creation wizard handles credential linking automatically:
- One verified credential in the org: that credential is linked to the new workspace automatically.
- Multiple verified credentials: the wizard prompts you to pick one. The selection is recorded as a per-workspace link.
- No credentials yet: the workspace falls back to the org default, or to the environment default.
Once a workspace contains at least one table, its credential link is locked. Re-pointing storage at a different credential after data has been written would silently change where new bytes land while leaving existing data unreachable on the new prefix. The API returns 400 with a clear message and the UI hides the Change credential action.
Link to an existing workspace
If a workspace was created before the credential existed, link the credential explicitly from the workspace's Storage settings, or via the API:
curl -X PUT 'https://api-beta.deeplake.ai/workspaces/<workspace_id>/credential' \
  -H 'authorization: Bearer <TOKEN>' \
  -H 'x-activeloop-org-id: <ORG_ID>' \
  -H 'content-type: application/json' \
  --data-raw '{"credential_id":"<CRED_ID>"}'
Verify the connection
With the credential in verified state, create a test table from the SDK:
import deeplake

client = deeplake.Client(token="<your_api_token>", workspace_id="default")
client.query(
    'CREATE TABLE "smoke_test" ("id" BIGINT, "name" TEXT) USING deeplake',
    timeout=60,
)
client.query("INSERT INTO smoke_test VALUES (1, 'hello'), (2, 'world')", timeout=60)
print(client.query("SELECT * FROM smoke_test"))
# [{'id': 1, 'name': 'hello'}, {'id': 2, 'name': 'world'}]
If the round-trip succeeds, the credential is fully working. Objects land in your bucket under <base_path>/<org_id>/<workspace_id>/smoke_test/. They are browsable in the AWS Console under S3 → your bucket.
Troubleshooting
Path A: "InvalidClientTokenId" or "SignatureDoesNotMatch"
The submitted access key is wrong, was deactivated, or has been rotated.
# Confirm the key is active and belongs to the expected user.
aws iam get-access-key-last-used --access-key-id <KEY_ID>
aws iam list-access-keys --user-name <USER_NAME>
If the key is inactive (Status: Inactive), re-activate it with aws iam update-access-key --access-key-id <KEY_ID> --status Active --user-name <USER_NAME>, or generate a new key with aws iam create-access-key --user-name <USER_NAME> and resubmit.
Path A or B: "AccessDenied on s3:PutObject"
The principal does not have write access on the bucket. The most common causes:
- The inline policy from A1 or B2 was not attached, or was scoped to a different bucket.
- The policy uses
s3:GetObjectonly (read-only). - The bucket has a bucket-policy or SCP that denies writes from the principal's account.
Re-run the put-user-policy (Path A) or put-role-policy (Path B) from the policy snippet in the steps above. If the bucket has a bucket-policy, confirm it allows the principal:
Path B: "AccessDenied on AssumeRole"
The trust policy does not match what Deeplake is sending. The most common causes:
- The trust policy lists a different
Principal(wrong Deeplake account ID or wrong runtime-role name). - The
external_idin the wizard does not match the trust policy'ssts:ExternalIdcondition. - Multiple role versions exist; the active one is not the one with the trust policy.
# Inspect the active trust policy.
aws iam get-role --role-name <ROLE_NAME> \
  --query 'Role.AssumeRolePolicyDocument'
Re-copy the trust policy from the wizard (it has all three values pre-filled) and update the role with aws iam update-assume-role-policy --role-name <ROLE_NAME> --policy-document file://trust-policy.json.
Path B: "Could not reach STS to mint AssumeRole token"
Transient network issue between Deeplake's backend and sts.amazonaws.com. Retry. If it persists for more than a few minutes, contact support. There may be a regional outage.
"Bucket not found" or "NoSuchBucket"
Either the bucket name in base_path is wrong, or it does not exist in the region you submitted.
# Confirm the bucket exists and is reachable.
aws s3api head-bucket --bucket <BUCKET_NAME>

# Confirm the region matches.
aws s3api get-bucket-location --bucket <BUCKET_NAME>
If the region returned does not match what you submitted in the wizard, edit the credential and resubmit the correct region.
"Bucket name contains invalid character"
The submitted value violates S3's naming rules. The most common mistakes:
- Uppercase letters (S3 bucket names must be all-lowercase).
- Underscores (allowed in older buckets but rejected for new credentials, and warned for old ones).
- Consecutive periods (
my..bucket).
The error message names the offending character.
Wizard timed out, keep the credential anyway
Click Save anyway on the timeout screen. The credential moves to unverified_saved. The next call to /creds attempts an STS issuance and promotes the credential to verified on first success.
Reference
State machine
draft (created)
  |
  +-- Path A (IAM User Keys):
  |     submit access key -> probe write -> verified
  |
  +-- Path B (AssumeRole):
        create cred -> wizard returns Deeplake runtime-role ARN +
                       generated external_id -> customer creates role
                       with trust policy + bucket policy ->
                       submit role ARN -> Deeplake calls sts:AssumeRole +
                       probe write -> verified

verified
  |
  +-- generate STS triplet on demand (every workspace storage call)
  |     Path A: access keys minted as-is (or sts:GetSessionToken if scoping)
  |     Path B: sts:AssumeRole on customer role
  |
  +-- delete credential -> cascade-unlink from workspaces;
                           customer-side role/user not touched -> deleted
STS triplets are short-lived (1 hour by default) and minted on demand. pg_deeplake calls back to deeplake-api for a fresh triplet whenever the cached one approaches expiry.
API endpoints
All endpoints require Authorization: Bearer <api_token> and X-Activeloop-Org-Id: <org_id>.
| Step | Endpoint | Body |
|---|---|---|
| Create (Path A) | POST /organizations/{org}/credentials |
{"name":"...","storage_type":"s3","base_path":"s3://...","region":"...","creds":{"access_key_id":"...","secret_access_key":"...","session_token":"..."}} |
| Create (Path B) | POST /organizations/{org}/credentials |
{"name":"...","storage_type":"s3:role","base_path":"s3://...","region":"...","creds":{"role_arn":"...","external_id":"..."}} |
| Get state | GET /organizations/{org}/credentials/{id} |
(returns state, runtime_role_arn and external_id for Path B, and last-error fields) |
| Set as org default | PUT /organizations/{org}/credential |
{"credential_id":"..."} |
| Link to workspace | PUT /workspaces/{ws_id}/credential |
{"credential_id":"..."} |
| Unlink from workspace | DELETE /workspaces/{ws_id}/credential |
(none) |
| Delete | DELETE /organizations/{org}/credentials/{id} |
(none) |
For Path B, the create response includes runtime_role_arn and external_id; both are required to author the trust policy.
Data path after verification
SDK
  |  query / table write
  v
Deeplake API
  |  (mints a 1-hour STS triplet, scoped to your bucket,
  |   from your access key (Path A) or via sts:AssumeRole on
  |   your customer role with external_id (Path B))
  v
pg_deeplake / indra (storage layer)
  |  HTTPS PUT/GET to s3.<region>.amazonaws.com with SigV4
  v
s3://<bucket>/<base_prefix>/<org_id>/<workspace_id>/<table_name>/<object>
Three properties of this flow:
- Objects land in your S3 bucket under
/<org_id>/<workspace_id>/<table_name>/. They are browsable in the AWS Console. - The STS triplet Deeplake issues is short-lived (1 hour) and scoped to a single principal. Even if leaked, it expires fast and can only access what the principal can access.
- What Deeplake stores at rest: in Path A, the access key encrypted with envelope encryption (per-org KMS key wrapping a per-credential data key). In Path B, only the role ARN and external_id (neither is a secret on its own; the trust policy on your role is what makes them grant access).
Remove a credential
This:
- Removes the credential row from Deeplake's database immediately.
- Removes any workspace links pointing at it (those workspaces fall back to the org default or environment default).
- For Path A: asynchronously purges the encrypted access key on the Deeplake side.
- For Path B: the customer-side role and trust policy remain in your account untouched. Delete them manually if you want a full cleanup.
Optional customer-side cleanup:
Path A: deactivate or delete the access key in your account
aws iam update-access-key \
  --access-key-id <KEY_ID> \
  --status Inactive \
  --user-name <USER_NAME>

# Or delete it outright.
aws iam delete-access-key \
  --access-key-id <KEY_ID> \
  --user-name <USER_NAME>
Path A: delete the IAM user, if no longer used
aws iam delete-user-policy \
  --user-name <USER_NAME> \
  --policy-name deeplake-bucket-access
aws iam delete-user --user-name <USER_NAME>
Path B: delete the role
aws iam delete-role-policy \
  --role-name <ROLE_NAME> \
  --policy-name deeplake-bucket-access
aws iam delete-role --role-name <ROLE_NAME>
Delete the data Deeplake wrote: it lives under <base_path>/<org_id>/... in your bucket.
Table contents are not deleted automatically. The data remains in your S3 bucket after the credential is removed.
Getting help
If the troubleshooting section does not resolve the issue:
- Note the request ID from any error message.
- Note the credential ID, visible in the wizard URL or the credential list.
- Contact Deeplake support with both.